How Are Rugby Players Positioned on the Field and Why?
Greetings, Stockholm rugby fans and curious newcomers alike!
Have you ever watched a match and wondered what each player is responsible for? Well, you’re in luck! Today, we’re breaking down the roles of each rugby player on the field. Understanding these positions is crucial for fans who want to shout smarter at the next match. If you want to join the club, this guide will also be suitable!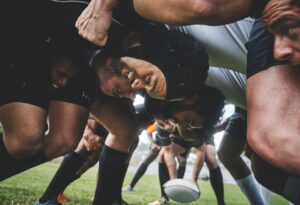
Rugby Scrum Players:
Props (Jersey #1 and #3):
Props are the cornerstone of the scrum, using their considerable size and strength to push the opposition and keep the scrum stable. They might not be the fastest sprinters, but their power plays a crucial role during scrum time.
Hooker (Jersey #2):
This player may be shorter, but they leverage their position by “hooking” the ball back to their teammates using a swift foot motion during scrums, pivotal for gaining possession.
Locks (Jersey #4 and #5):
Locks use their height to dominate lineouts and add the essential push in scrums. Hidden within the scrum’s heart, they are crucial for driving the team forward, transforming height into a tactical advantage.
Flankers (Jersey #6 and #7):
Tasked with defensive disruption and swift offensive support, Flankers are often first at the breakdown, securing the ball or making crucial tackles.
The 8-Man (Jersey #8):
Blending the roles of a Flanker and an additional power source, the 8-Man anchors the scrum’s back. They’re known for surprise runs that catch the opposition off guard and are pivotal in close-quarter plays near the try line.
Rugby Backs:
Scrum Half and Fly Half (Jersey #9 and #10):
The dynamic duo of the rugby field. Like a point guard, the Scrum Half feeds the ball into scrums and links the forwards with the backs. The Fly Half, a master of quick passes and strategic kicks, dictates the game’s tempo, making split-second decisions that can change the course of play.
Centers (Jersey #12 and #13):
Inside Centers (#12) are the hard-hitting runners, breaking through defensive lines with sheer power, while Outside Centers (#13) combine speed and strategic running to create scoring opportunities. Together, they form a barrier both in offense and defense.
Wings (Jersey #11 and #14):
Positioned on the outer parts of the line, they exploit gaps in the defense, turning slight openings into significant gains and often finishing the team’s sweeping moves.
Fullback (Jersey #15):
A versatile role, the Fullback acts as the last line of defense and a strategic counterattacker. Skilled in kicking and open-field tackles, they often save the day with crucial last-man stands and can turn the tide with a well-placed kick.
So, My Wings Are Full Back in the Center. What?
There you have it! From the burly Props to the swift Wings, each rugby team position has unique challenges and skills. So next time you watch a match, you’ll recognize what each player is doing and why they’re doing it – adding a whole new layer to your rugby fandom.